Menu

Show posts

This section allows you to view all posts made by this member. Note that you can only see posts made in areas you currently have access to.

Show posts Menu

Topics - Joris Ceoen

#1
WIP Levels / ze_aqualabs (WIP)
March 18, 2016, 04:56:42 PM
This is currently my entry for the first old school level design contest: https://www.dropbox.com/s/2jz65gqvs1et0ux/ze_aqualab_a2.rar?dl=0

----

> INFO <

ze_aqualabs is a Zombie Escape map and is currently under development for CS:GO. Zombie Escape is a mod where many online players fight a horde of player-controlled zombies to escape and survive an apocalypse scenario. It already features over hundreds of maps and has always been a free, popular mode since Counter-Strike 1.6

It features up to a max of 64 players on a server and the maps are always made with this scale in mind. Simple and usually short ZE maps consist of a few escape routes with the goal of reaching a vehicle or other means of transportation to get rid of the zombie, or a nuclear missile launch to wipe the horde once and for all. Either way, you get to escape and defend against zombies with little other means to care about.

More advanced maps consist of complex puzzles combined with incredible boss battles that have tons of weaponry and powers to fight against the human group. Some of the most impressive maps have multiple levels, bossfights and special items + characters to spice everything up. My absolute all-time favorite is ze_Predator by Luffaren:
https://www.youtube.com/watch?v=tuz52d_pHLM

I don't want to compare maps, as each ZE map is unique on its own, but I tend to borrow many elements that popular zombie escape maps have established in the past. I notably want to have zombies play a part in boss battles should I ever include some in my map.

> CONCEPT <
Needless to say, the current map as it is is nothing more than a concept for what it will be heading towards to in the future. I have only seen one map coming close to the same concept, but I didn't think it was very well executed in terms of visuals and gameplay (although the latter of those two was the better part of it).

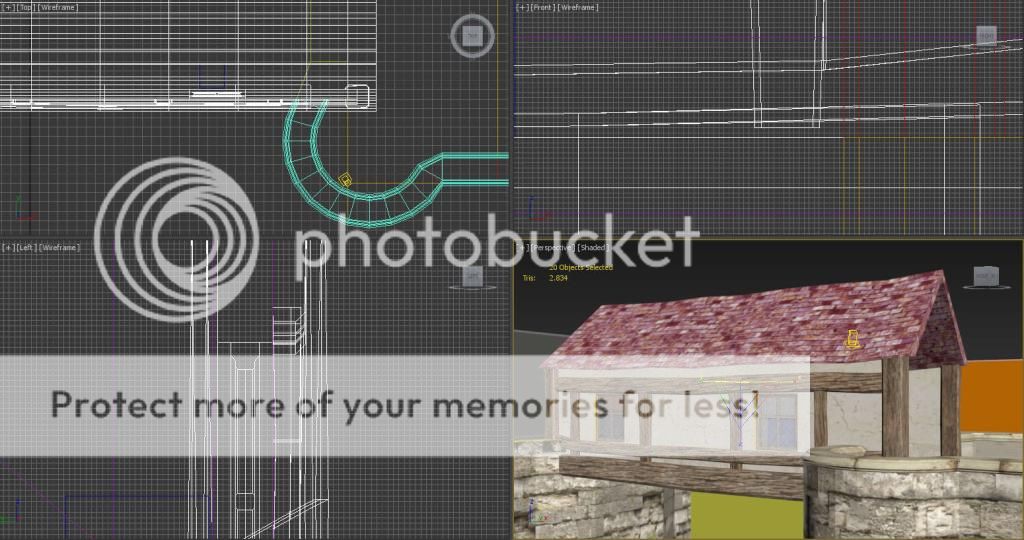
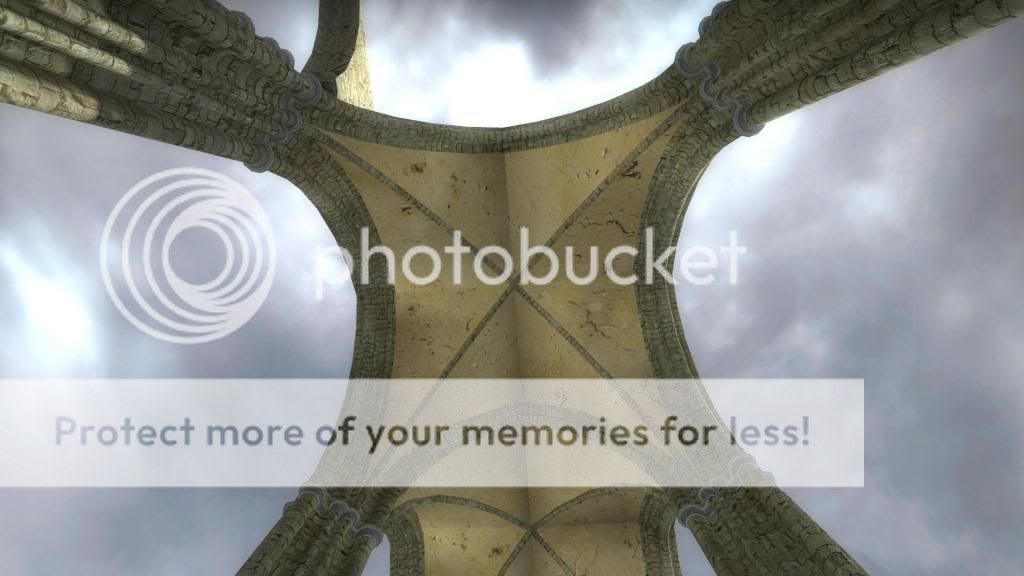
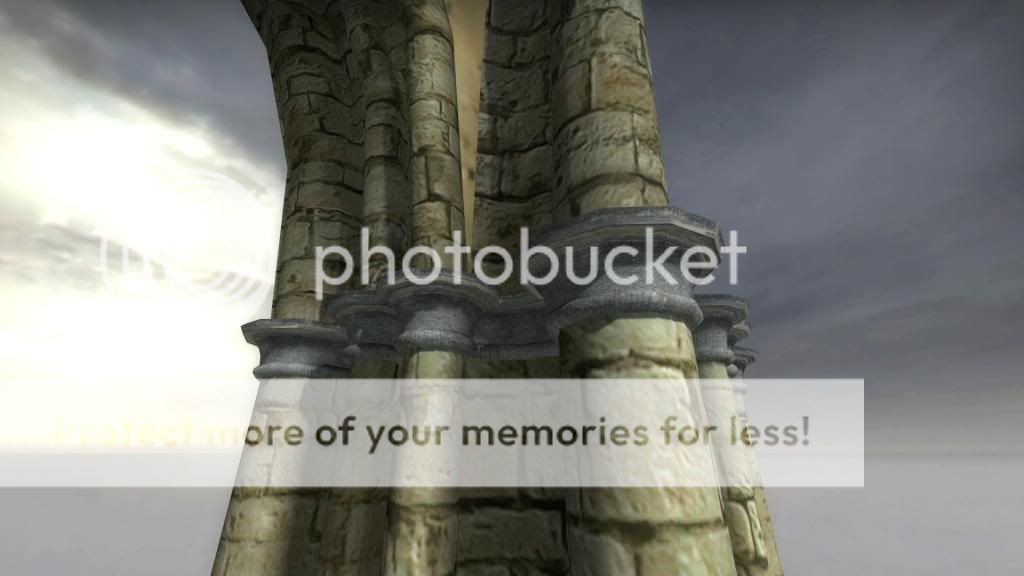
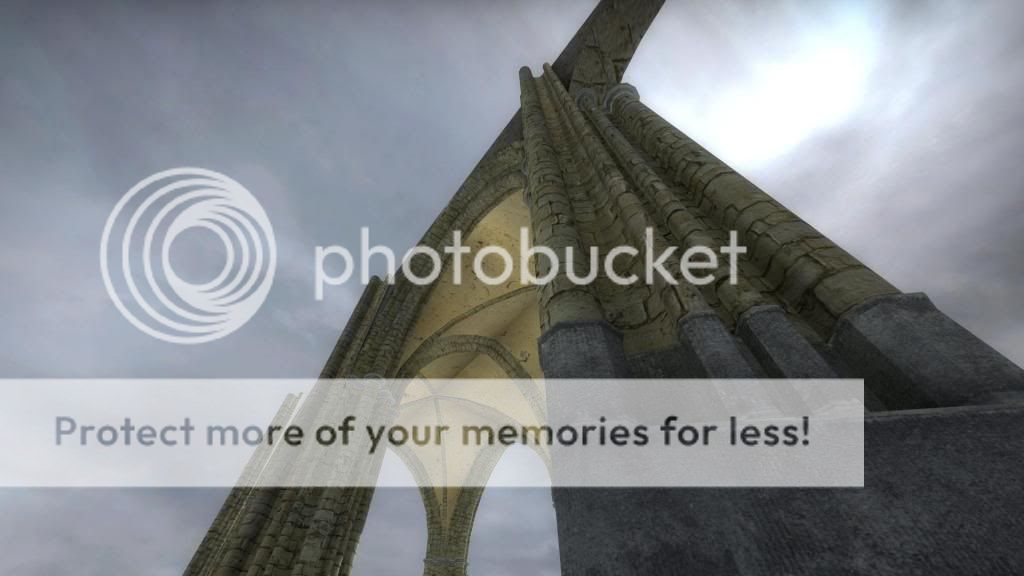
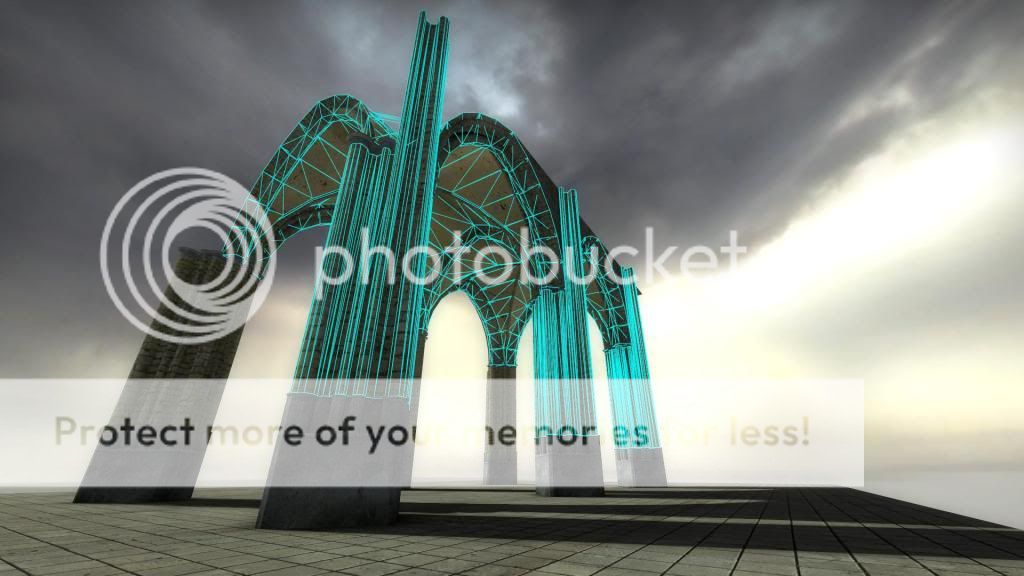
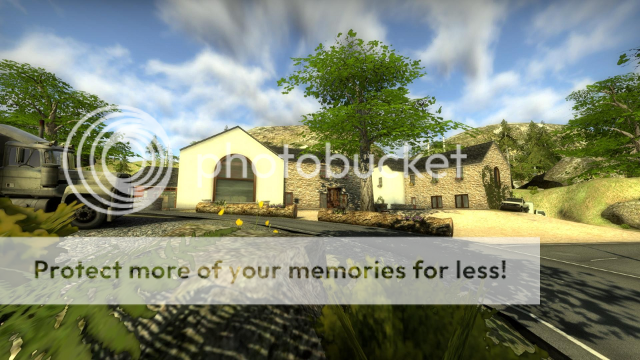
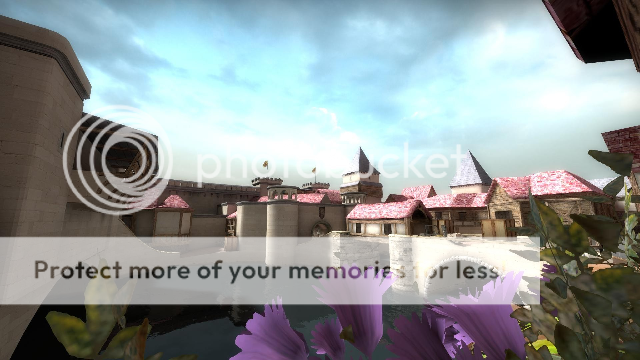
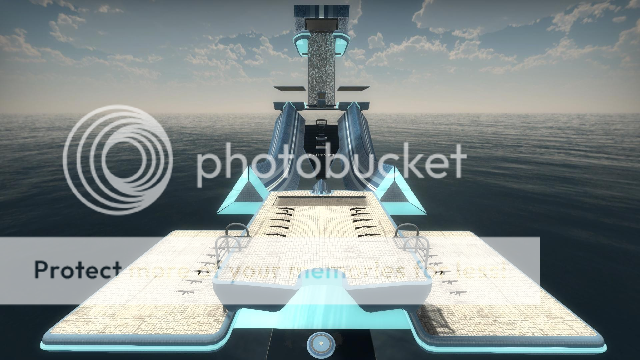
With just brushes I could have brought this map further, but time is a difficult and precious thing to find, and I wouldn't believe it was until just a few months ago. Nothing to do about it, and no point whining, the concept of the map is to bring you an interesting world that mainly takes part under the sea, which is why it is called aqualabs. I want to display a factory that is working underwater on some crazy projects that ultimately go wrong, which is where it all starts and why I think Zombie Escape is the ideal mode to contribute the map to.

The next iteration of this map will feature first of all:


  • A playable status. Minimap and overlay included.
  • More escape routes.
  • Improved graphics (hardly any difficult at this point).
  • Sounds.
  • Special items and one boss battle.

The goal of making you feel as if you are underwater is very important for me. I will try everything possible to achieve this effect with some trickery stuff that will hopefully not end up being too expensive. Some of the latest shader improvements will help make this easier, so I will take advantage of that.

----

For now, you can simply dive into the map and kind of feel where it wants to go to. I do feel like I need to apologise, because it's not usually my doing to present something so principally unfinished, but I had simply not enough time with everything going on at this very moment. For the next contest I feel like it will provide my entry with more opportunities to show off.
#2
WIP Levels / de_pontifici (CS:GO)
February 28, 2015, 03:33:37 PM
Hello everyone,

Here I am again, with a brand new concept in the making.


Nothing fancy (yet). This time around I didn't want to fall for the 5th time in the same 'trap' I have always been falling into in the past, in other words recreating something existing like I have always done. Instead I started with a complete greybox, then playtested it and only then after tweaking and readjusting that same greybox to have a balanced result I started texturing and adding props on places I'm 100% sure to utilise.

This will allow for something totally new to be born among my older realisations as it will be the first map to be raised from thin air with almost no inspiration from pre-existing locations or monuments. It will also be more competitive with rotation times and bombsite locations thoughtfully implemented as opposed to randomly placed/lucky guessing timings and events.
#3
WIP Levels / de_cathedral (CS:GO)
March 04, 2014, 04:48:40 PM
Hello everyone,

So here I am again with a WIP of yet another cathedral... I did not abandon the previous version though I paused it for a CS:GO version that will be a completely new realisation of a cathedral that will push the gothic style even further.

Because it's going to be created for CS:GO I can mess around more with polygons and do just a little bit more compared to CS:S (I just need to keep away from using too many alpha textured models suggested by Robert Briscoe). That's not all, because this time around I will be using Wall Worm Model Tools' Anvil elements and CorVex completely, in other words I'm intentionally making this project to learn working with these amazing tools, and so far I have only been extremely positive and the experience and effectiveness of the tools are incredible so far, when I have used like probably not even half the program so far.

Not only is it amazing because you circumvent every external step that was earlier necessary, but everything is right on the boat, if something is wrong or missing, I'll just create it right into my level and when it's done it'll be there and on the end I'll just have to hit export a few time to get everything into a .bsp and get the map running.

Not to mention, if you remember that doing something wrong in Hammer is often the absolute end of your vmf, this is not the case in 3DS Max, so you have much more freedom in experimenting without you having to worry about corrupted files.

Anyways, enough of that, for those who used it or are using it they know what I mean. Here are some very early WIP screenshots of how it currently looks like, although those models in the pictures are the very final product of how some of the base elements of the cathedral will look like:


The last picture is showing the collisions for those who would be interested. Collisions are now even easier in 3DS Max. I mean, I used to make all of them in Sketchup because earlier in Sketchup I found it easier to do measurements, now this is completely useless with the introduction of CorVex.

If someone has remarks or commentary, I'd love to hear about them!
#4
So I have recently been stumbling across an unusual error in 3DS Max while using Anvil and CorVex.


This never happened until I started to copy-paste previously baked geometry. Either that, or because I copied an already existing model in my scene that was assigned to a WWMT helper and then when I wanted to select it to make a new model and new WWMT out of it it just redirected me to the original model.

As such, I thought I would make a new box, assign it as new model, add the copied model on it, deleted the box, then tried exporting it. Then, when I wanted to export the scene as .vmf it also ended up giving the error.

The weird thing is, I reverted to a backup copy file where none of these previous changes where done and I started again copying the baked worldbrush geometry and first exported it to test, and it worked. Then, I selected an earlier copied pillar from the original model (which was back then not assigned to a WWMT) and it produced a fine new WWMT helper, and set up everything, exported the model. But then again, when I wanted to export the scene, it gave me the same error.

The problem of the error is that it locks 3DS Max in some kind of way where no matter what I select, I can't see any names/modifiers and I can't do anything at all.

I can't continue mapping at this point in the file, which is why I resorted to the forums.
#5
WIP Levels / ze_cathedral_css
August 01, 2013, 03:03:31 PM
ZE_CATHEDRAL (CS:S)
URL: http://gamebanana.com/projects/34608


This cathedral is being built for the Zombie Escape community (mainly for PlagueFest, but any other ZE server is completely free to use it!) and is entirely built by me. It uses Google Sketchup, 3DS Max and WWMT to their full potential for delivering the best possible results on the Source Engine (the CS:S and HL2 version).

This map has a precedor, currently available for download, but inefficient to host on a server: http://csgo.gamebanana.com/maps/168170
Why? Because it was created under severe pressure, in a timespan of 5 days and back in the time it were my very first models, where I didn't know everything about polycount and methods to increase performance.
I believe the entire cathedral when rendered exceeds a million polygons with all of the models together, making it combined with many players and dynamic elements a pain in the butt for computers to run. It runs at 45fps in average when fully rendered, which is a no-go.

In time with many other projects until now I have learned so many methods to optimize from the roots up that I was finally able to re-start a project that is very hard to realize, a fully standing cathedral where 64 players can run into with at least 100fps or more at dynamic moments, with the necessary aesthetics. This new cathedral has many different approaches over the first version:


  • The entire cathedral architecture consists of 1 texture. All of the models are UV-mapped with one 1024x1024 sized texture containing the 3 most important textures, being the cathedral walls, marble pillars and dark-stone-like concrete supports. The older one had 3 albedos/textures (512x512) one all of the models, making it more expensive. This may look like a ridicilous way of increasing performance, but for a map at this scale every little bit counts for something!
  • The polycount plain and simple is 3 times less than the initial models, being much better organized and looking much better, if not being incomparable. Certain other models are also differently designed over the old one, being more realistic towards real-existent cathedrals. This makes the difference between everything bein rendered at 170FPS instead of 45...
  • The frontwing has a double corridor-structure instead of the older single one.


  • The windows now are all 2 polygons while the older windows had around 50 polygons (counting 50 polygons x 60 times...). Also the windows frames are around 400 polygons while the older ones where 3500+ being incredibly expensive for little to no better results.
  • Brushwork is now integrated in a work-friendly environment instead of an impossible-to-fix result over the older one

I cannot predict when this project will be done, as I will also create a complete outside framework for the cathedral (something which I haven't done in the older version for obvious reasons) and also add many more gameplay elements than before. I did learn that taking all the time pays off instead of rushing anything with projects as fragile as these, so never rush anything, even if it takes years! Currently there is around one month of work in this cathedral (working arguably 3 weeks onto it, about 3-4 houres a day).

This wouldn't be possible without WWMT, I mean I need to align everything perfectly, and with the easy illuminating origin, texture export and model tweaking tools WWMT provides it makes everything so easy. Sometimes when I realise such a tool wouldn't exist, there would be no way for me to be standing where I am now. Many options such as collision models, sequences, illuminating origin, attachements, LODS, Custom Breakable Gibs and so much more were totally inexistent to me until I discovered them with WWMT.

I will post extra screenshots to share so far. Except for the first 4 screenshots (including the 2 above) I quickly took the effort to go back into the map and take updated screens of the work so far:


I'll keep this thread up-to-date when something important is to be shared!
#6
Hello everyone. As WWMT helped me across all of my level designing blocks and allowed me to realize numerous projects, I decided to post them here for everyone to understand the power and utility behind the tools Shawn provides us. I realised during my developments that Wall Worm acted as a decisive bridge between 3DS Max and Source and without it, nothing here below would have existed, or barely coming to the results I could achieve so far.

ZE_CATHEDRAL (CS:GO)
URL: http://csgo.gamebanana.com/maps/168170


Made on request, it's my very first project to have ever been finished and released. It's in critical condition, deserted and the performance is below average, but the entirity of the cathedral you see is modeled inside of Google Sketchup, imported into 3DS Max for texturing and then exported with the Wall Worm Model Tools (WWMT from now on). Without WWMT I would probably never finished this project, and maybe I would never have continued level design. Cathedral was my first step into the Level Designing world and still remains (for me) one of the most iconic maps.

DE_WINTER_FOREST (CS:GO)
URL: http://csgo.gamebanana.com/maps/171244


A smaller project finished in 5 days, featuring a large-scaled outdoor, winter-like environment. It was the first map to use custom trees that used the Sway shader (By copying the Urban Tree MVT values at the time) and all of the models where used in conjunction with WWMT. Again, I have to mention that I would not be able to make these without the WWMT. Yes, I could have used custom models that were already compiled and exported for the Source Engine. Then again, CS:GO was just released at the time so there was no way people released foliage models that were compiled for the CS:GO version of the Source Engine (as you have to recompile models with the studiomdl.exe from CS:GO). I still had to learn about the VTF settings and alpha maps and pixel art in general, so the map received a huge update after release, fixing all of those old issues.

CS_ARDENNES (CS:GO)
URL: http://csgo.gamebanana.com/maps/173968


Ardennes was my first ambitious project where I wanted to take my artistic endeavours to the next level. The map is an attempt to prove that the Source engine does handle large environments, with lots of foliage. It is not the best optimised map however, and still has many issues gameplay-wise. I learned some new techniques with this project which allowed me to delve deeper into the 3DS Max tools. It took me 3 complete months to finish the project. All of the texturing and modeling was done in 3DS Max, Sketchup and exporting with WWMT.

This time I also wanted WWMT to take a very important role in exporting such as using the illumination origin option, using the origins of models to perfectly align across brushes (I calculated all the brushes their dimensions and then I made models onto those in the 3D modeling program Sketchup to have them perfectly align, then export to Source and the results are outstanding). I created and used fully working custom breakable props, which I found otherwise unable to create, all thanks to WWMT!

Ardennes is also the first map where nearly every single model is made with the WWMT, without Wall Worm there was absolutely no way I could even start this project. It was, however, designed in Hammer and Sketchup, something which would fade away after in future projects.


AWP_RATS_ELECTRIC_ORGAN (CS:S)
URL: http://csgo.gamebanana.com/maps/173968


A special project where I recreated my electric organ at home. It was released for a contest, and although it never won any spot, I remain confident it was one of the most original of all entries. The stops, keyboard and pedals were all photographed, modeled, textured and finally exported with the WWMT. It was a lovely project to work onto, unfortunatly it's clear that it never saw the light of day at any point in time during and after release, and is now entirely abandoned.

It was my only work on Source (as opposed to CS:GO).

HIMEJI_CASTLE (CS:GO)
URL: http://csgo.gamebanana.com/maps/177542


At the time, Himeji was a huge leap forward compared to all my previous works in nearly every aspect. It was extremely ambitious and required me to learn many new tricks on a timespan of 35 days for yet another contest (Famous Landmarks). Originally I wanted to create the Atomium from Brussels... but after 5 days of trying and getting frustrated it just didn't work. It was then that I saw an image of the Himeji Castle on Google and I was instantly grasped by its beauty and detail.

I brushed out my knowledge of modeling and texturing, using Sketchup to model and 3DS Max to texture. This was the last project to ever use Google Sketchup and Hammer to solve independent tasks of my projects. Himeji took exactly 35 days to complete with considerable time spent on the map, each and every day. Having time over at the last 3 days I added more detail and gameplay elements. Later after release it received a huge update and a better attempt towards competitive play. The map is still unfinished and is one of the few projects that I want to finish later down the road.

Himeji took first place, as can be seen here: http://gamebanana.com/contests/winners/42 Having been the first map to ever win a place it boosted my spirits to continue.

DE_CATHEDRAL (CS:GO)
URL: http://csgo.gamebanana.com/maps/181217


Despite its barren gameplay and experimental graphics, Cathedral holds a special place in my heart because it is the first map I have ever attempted to finish and release publicly while being made entirely inside 3DS Max with the aid of the Wall Worm Level Designing tools (Wall Worm Anvil, WWA from now on). WWA and WWMT allow you to essentially make a fully fleshed out map in 3DS Max without ever leaving the program or environment, or even entering Hammer for that matter. You can design brushes, models and textures all in 3DS Max, so why would you even want to switch between all these programs to essentialy waste a lot of time for the same results.

Such filosofy allowed me to change my workflow and transfer towards Wall Worm for creating all my levels. There are so many essential tools in 3DS Max which simply aren't present in Hammer. If you count that on top of all the tools designed by Shawn Olson such as the 3D Skybox converter, Sky Writer, Corvex, Carver, ShellVex, Detailer, PropLine and finally Wall Worm Pro, you're saving houres and houres of work.

Admittedly, while it holds a special place, it is nearly impossible to properly play on because of scaling issues and shading problems. I was faced with the hard reality that gameplay is, and remains the key element of a map.

DE_PONTIFICI (CS:GO)
URL: http://csgo.gamebanana.com/maps/185072


Pontifici was the first attempt to improve the gameplay element of a map, taking the basics of the competitive spirit to play by balancing timings for bombsite and cover, while still trying to go for a relatively open map. It should give you the feeling of being in a medieval town that uses a canal for transport, connecting both sides with a bridge.

While it succeeded in gameplay partially, it can be improved, and already underwent considerable art-transformations that are unreleased as we speak.

SPACE MARBLE (CS:GO)
URL: http://csgo.gamebanana.com/maps/185591


Space Marble is the direct result of my temporary retreat of the classical gamemodes such as Bomb Defusal and Hostage Rescue. It is a prime example of a map that hugely benefitted from Wall Worm as a whole. The map simulates a Marble Track by letting spheres roll around with purely physical interaction. A very tough task to ask for the Source Engine if you consider that physics are very dependent on material type and object weights.

In order to create the tracks, I used splines for crazy turns and creative routes that at times also diverge into branching paths. In Hammer this would have been a hell of a nightmare to design considering that you'd have to create the tracks and then export them, and then reposition the new track everytime, hoping that it is attached seamlessly to the previous one etc etc...

Space Marble took first place, as can be seen here: http://gamebanana.com/contests/winners/61

SURF_GREATRIVER_2015 (CS:GO)
URL: http://csgo.gamebanana.com/maps/185591


Greatriver is probably one of the most popular surf maps of all time. CS:GO currently has a hard time to really grasp CS:S players to over to the new game, so I decided to support the Surf Community by remaking this iconic masterpiece. Black is the original designer of the concept and first version, and Xdream (clan) has made considerable improvements over the map.

I co-operated with a professional surfer who has a lot of knowledge about surf that I simply didn't know. He adviced me to keep the map as close as possible to the original, as well as removing some elements which simply had nothing to do with the gameplay. I intend to bring the ultimate greatriver edition by focussing on Surfing as much as possible, rewarding those with great skill, as well as making the map just a little bit noob-friendly. The most controversial change is undershotty being removed (a connection on a sloped surface on the back of the ramp that starts from the 3 little platforms with the shotgun, hence 'undershotty').

Greatriver 2015 boasts a ion-like design and tried to guide the player on the ramps by using linear textures. Reflection and river-like elements are important, so the map is mainly tainted in blue.
#7
I have a problem with a model I recently animated.

I got Sonic from SSBB and I have nicely put all the textures onto it. There was none but one problem with his eyes texture, it was tiled for some reason and there's no way I could remove the tiling (or I just don't know how to do that....) So what I did was cropping and replacing the eye's texture so they were perfectly in place so that you can't see it's tiled.

Now when I export both model and vtf's it looks very fine but the texture of his eyes are put back onto their original position with the tiling visible. I have tried millions of changes but it just doesn't seem to stay in place.

Any help?

(I can send the max file ofc)
#8
WWMT Questions / $attachment really complicated...
February 23, 2012, 07:32:16 AM
Ok, I'm really experimenting with all the WWMT, and I recently came across that attachment menu and particles. It's really something I need, it's vital for the visual performance on my map.

I did everything correctly I think, but when I use the sequence by which the particle is attached to the bone, it simply doesn't show up. I'll post what's in the QC file:


//QC File generated by the Wall Worm Model Tools Version 1.745
//Get the latest version and notes at:
//http://wallworm.com/projects/utilities/docs

$scale 1
$modelname   "3dsmaxmodels/SSBB_Ike.mdl"
$body SSBB_Ike "SSBB_Ike.smd"
$cdmaterials "3dsmaxmodels"
$sequence idle "SSBB_Ike" loop fps 30
$sequence Ike_standidle "Ike_standidle" loop fps 30
$sequence Ike_move "Ike_move" loop fps 30
$sequence Ike_normalattack "Ike_normalattack" fps 38
$sequence Ike_specialattack "Ike_specialattack" fps 30 {
{ event AE_START_SCRIPTED_EFFECT 0 "explosion_huge follow_attachment Fire" }

{ event AE_END_SCRIPTED_EFFECT 30 "explosion_huge follow_attachment Fire" }
}
$attachment "Fire" "ValveBiped.Bip01_L_Hand" 0 0 0 rotate 0 0 0


$include   "SSBB_Ike_wwmt_custom.qci"


So: My model is Ike from SSBB. When he uses the specialattack, at the left hand (where his sword is), should that particle explosion_huge start...
When I use it in-game, it doesn't work.

When I check the attachment location in the model viewer, it shows exactly the attachment's location, but no particle...


What am I doing wrong? Any help?

Many thanks!

PS: I used that explosion_huge simply because it is in the VDC. I actually want it to work with a particle I made in the particle_editor, but let that aside atm.
#9
WWMT Questions / Don't understand $sequence
February 18, 2012, 06:33:13 AM
I have made several nice animations for my model, but when I add sequences, after I compilte them, he makes smd models specifically for my model. That's exactly the way it should be.

However, when I open it up in my model viewer, I can't select any of those sequences. So what did I do? I opened up the .QC file and added the sequences. They still don't show up. I saved in 3DS Max my models EVERY TIME appart so that I really have now a seperate model for every animation, then add the sequences in the QC and it STILL doesn't show up. Sometimes, on otehr models which I animated, they do show up after an hour of trying to seek what the problem was. In the end, I didn't know what to do. But now, I really tried everything, and I can't simply get them to work.

I just think I don't understand how animations work in Source. I know there is a directly accessed 'standard' model and then you get your animations, but mine doesn't want to show them up. Any help?
#10
I have a strange thing: It used to work perfectly, I got all paths set up correctly and I have exported models before.

What happened: I was as usual animating my model, and suddenly I got a BSOD... Ok I return to 3DS Max 2012 and I redo my animations which I lost.
I got back to the point where it crashed, and everything worked fine.


Now, when I hit the export button, he start creating all the files, and at the "SMD MODEL pridedemon"


It just stays there, it does NOTHING AT ALL. The only thing I can do is close the compile window, and by that nothing happened.
I couldn't find a single thing to do to fix it, any1 help?

I have provided a screenshot of the compile window
SMF spam blocked by CleanTalk